4-Bar Linkage Hatch Mechanism Explained: How Silo Covers Lift and Clear in One Motion


Lifting a heavy industrial hatch sounds like it just needs a strong hinge. But a simple hinge has a problem: the lid swings through an arc centered on a fixed pivot, which means it either needs a lot of clearance above the opening to swing clear, or it stays partly over the hole no matter how far it opens. For grain silos, underground bunkers, and storage tanks, that's rarely acceptable — the opening needs to be completely clear for loading or access.
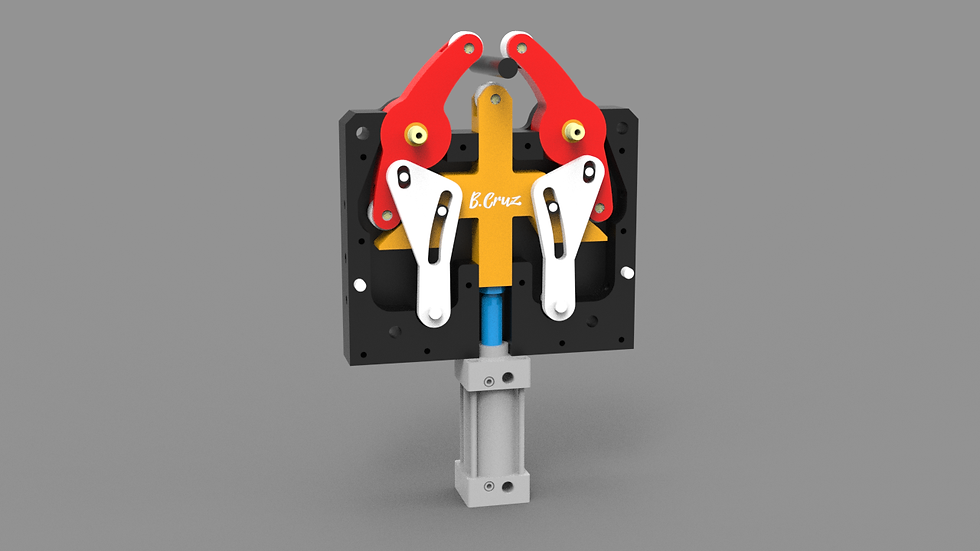
The mechanism in this design solves that with a single pneumatic cylinder and a four-bar linkage — the same fundamental mechanism covered in our Four-Bar Linkage guide, applied here in a way that's easy to miss at first glance: the lid itself is the coupler link.
Mapping the Hatch to Four-Bar Linkage Theory
If you've read our general four-bar linkage breakdown, this mechanism is a direct, physical example of the same four links — just packaged so that one of them happens to be the visible, functional part of the machine:
The ground link: The fixed base and frame beneath the hatch opening.
The crank: A short green rocker arm, pivoting on the base, driven directly by the pneumatic cylinder hidden underneath the floor.
The coupler: The white lid itself. Unlike the abstract "floating link" in a textbook four-bar diagram, here the coupler is the actual functional output — it's the part doing the job of covering and uncovering the opening.
The follower: Two long red guide arms, pivoting on the base at a different point than the crank, and connecting to the lid at a different point than the green arm does.
Because the green crank and the red follower arms have different pivot points and different lengths, the lid — the coupler — is forced to follow a specific, non-circular path as the mechanism moves, exactly the way any coupler point traces a unique curve in a four-bar linkage. That's not a side effect here; it's the entire point of the design.

Download the CAD File
Grab the CAD files (it’s free)
Try It in the Four-Bar Linkage Simulator
You can actually model the geometry of this exact hatch mechanism using the interactive four-bar linkage simulator from our main linkage guide:
Set the ground length to the distance between the green arm's base pivot and the red arms' base pivot.
Set the crank length to the green lifting arm's length.
Set the follower length to the red guide arms' length.
Set the coupler length to the distance between the two pivot points on the lid where the green arm and red arms attach.
Watch the coupler curve traced by the point representing the lid's outer edge — that curve is exactly why the lid lifts up and pulls back instead of just swinging open like a door. Adjusting the relative lengths in the simulator shows directly how changing the linkage geometry changes how far back the lid clears, and how high it lifts before starting to translate horizontally.

How It Works, Step by Step
Linear input. The pneumatic (or hydraulic) cylinder, hidden below the floor, extends its rod in a straight line.
Crank rotation. The cylinder drives the green rocker arm, forcing it to pivot at its base connection.
Lift begins. As the green arm rotates, it pushes up on the lid from underneath, starting the lid's motion.
Guided trajectory. At the same time, the two red arms — pivoting at a different point and with a different length than the green arm — constrain how the opposite side of the lid can move. Because both links are driving different points on the same rigid lid simultaneously, the lid can't simply rotate about a single fixed pivot.
Combined lift-and-pull-back motion. The combined effect of the crank pushing from below and the follower arms constraining from above is a coupler curve that lifts the lid upward first, then progressively pulls it horizontally backward as the cylinder continues its stroke.
Full clearance. By the end of the stroke, the lid has been moved completely clear of the opening — not resting at an angle over part of the hole, and not requiring overhead clearance space the way a simple hinge would.
Why Four-Bar Beats a Simple Hinge Here
A basic hinge only gives you one design variable: how far the lid rotates. A four-bar linkage gives you the relative lengths and pivot positions of two separate arms — which means the coupler curve, and therefore the lid's exact path through space, can be tuned to fit the specific clearance constraints of the installation. That's genuinely useful on heavy equipment: a lid that needs to end up flat, out of the way, and not obstructing whatever equipment loads or accesses the opening below, without needing extra overhead space to swing through.
It also distributes the lifting load across two separate linkages instead of one hinge pin, which matters for a heavy lid — the green crank does the active lifting work driven by the cylinder, while the red follower arms carry a share of the load and dictate the lid's final orientation, rather than one pivot point bearing the full weight and moment through the whole motion.
Real-World Applications
Grain silos — clearing the loading opening completely for filling or inspection.
Underground hatch covers and bunker doors — lifting a heavy cover fully clear of an access opening.
Industrial mixing vats — providing full clearance for loading or maintenance access.
Heavy-duty dumpsters and waste containers — lifting lids clear for top-loading equipment.
Automated bunker and storage tank doors — any application needing a heavy cover to move completely out of the way from a single actuator.
The CAD Design Challenge: Sizing the Linkage Without Binding
Getting the link lengths right so the lid clears the opening and the pneumatic cylinder never binds partway through its stroke is a classic kinematics problem, best solved in the same order as any four-bar design:
Start from the required lid clearance, not the linkage lengths. Define where the lid needs to end up (fully open, fully clear of the opening) and where it starts (closed, sealing the hatch), then work backward to find crank and follower lengths that connect those two positions with a smooth coupler path.
Check the transmission angle through the full stroke, exactly as you would for any four-bar linkage — a heavy lid moving through a poor transmission angle partway through its travel will bind or require excessive cylinder force right when it's carrying the most load.
Verify the cylinder's stroke length matches the crank's actual rotation range. It's easy to size the crank and follower correctly for the lid's path, then discover the cylinder itself doesn't have enough stroke (or has too much) to drive the crank through the needed angle — check this early, not after the linkage geometry is finalized.
Simulate the full motion, not just open and closed positions. The whole value of this mechanism is the path in between — run a complete motion study to confirm the lid doesn't contact the frame or hang up on itself anywhere along the way, not just at the two end positions.
Common Problems and Troubleshooting
Lid doesn't clear the opening fully: Usually means the coupler curve wasn't verified through the complete stroke — recheck the linkage lengths against the required clearance path, using the simulator above to test different ratios before committing to final dimensions.
Cylinder binds or stalls partway through the stroke: Check the transmission angle at that point in the cycle — a heavy lid moving through a shallow transmission angle demands far more cylinder force than the same load at a favorable angle.
Lid rocks or doesn't sit flat when closed: Typically a small mismatch between the crank and follower pivot positions relative to the lid's actual attachment points — verify both links return to their exact closed-position geometry, not just an approximately similar one.
Frequently Asked Questions
Why is the hatch lid considered the "coupler" link in this mechanism? Because it's connected to two separate arms — the green crank and the red follower — at two different points, and isn't directly fixed to the ground link. That's exactly the definition of a coupler in a four-bar linkage; it just happens to also be the visible, functional part of the machine rather than an internal connecting link.
Why does the lid lift up and then pull backward, instead of just swinging open? Because the crank and follower have different lengths and different pivot points, the lid — as the coupler — is forced to follow a specific curved path rather than rotating about a single fixed point the way a hinge would, producing the combined lift-then-translate motion.
Can I test this hatch mechanism's geometry before building it? Yes — the four-bar linkage simulator lets you enter the ground, crank, coupler, and follower lengths from this design and see the resulting coupler curve live, which is exactly the path the lid's edge would trace.
What's the biggest design risk with this mechanism? Binding partway through the stroke due to a poor transmission angle, or discovering the cylinder's stroke length doesn't match the crank's required rotation range — both are best caught by simulating the full motion early, not just checking the fully open and fully closed positions.
Want to see this mechanism in motion? Watch the 4-Bar Linkage Hatch Mechanism animation on our YouTube channel for the full 3D breakdown, including the side-profile view that shows exactly how the two linkage lengths dictate the lid's lift-and-clear trajectory.
Related Mechanisms
Four-Bar Linkage Explained (with Interactive Simulator) — the full theory behind this mechanism, including Grashof's condition, transmission angle, and the live simulator used above.
Explore more in 3D Mechanisms and Mechanical Movements.


Comments